If you have just purchased your first slow cooker — or if you own one that has been sitting in a cabinet unused because you are not sure where to start — knowing how to use a slow cooker properly is the key to unlocking one of the most powerful and time-saving appliances in the modern kitchen. A slow cooker promises the ultimate kitchen efficiency: 10 minutes of morning preparation that delivers a complete, deeply flavorful home-cooked meal to your table at the end of a busy day with zero additional effort.
As a kitchen efficiency expert based in Austin, Texas, I use my slow cooker weekly and consider it one of the highest-return appliances available to busy home cooks. The slow cooker is not complicated — but there are specific techniques, timing guidelines, and common mistakes that separate consistently excellent slow cooker results from the disappointing, watery, or overcooked dishes that give some beginners a poor first impression of this extraordinary appliance.
Here is my complete, practical guide on how to use a slow cooker in 2026 — covering every setting, timing guideline, essential technique, and beginner-friendly recipe to get you started with confidence.
Table of Contents
Understanding Your Slow Cooker Before You Cook
Before we cover how to use a slow cooker for specific recipes, it is essential to understand what your appliance is actually doing and why it produces such unique results.
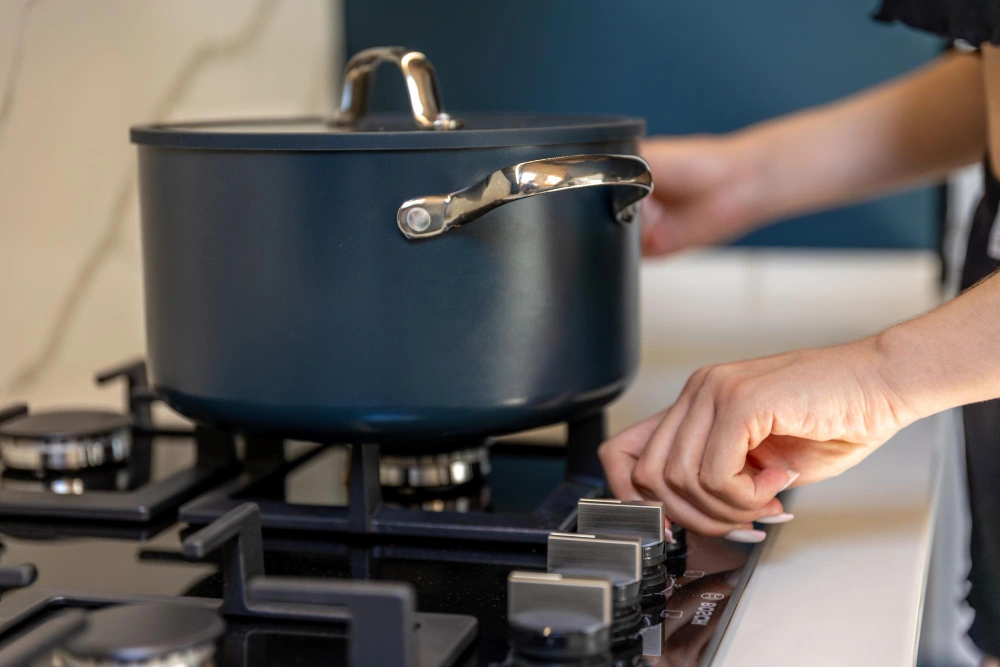
The Basic Anatomy of a Slow Cooker:
- The Base: Contains the heating element that wraps around the cooking vessel, providing even, consistent heat from the sides and bottom
- The Cooking Insert: A ceramic or non-stick removable vessel that holds your food and distributes heat evenly throughout the cooking process
- The Lid: A heavy glass or ceramic lid that seals moisture inside, creating a self-basting cooking environment
- The Control Panel: Settings that determine cooking temperature and, on programmable models, cooking duration
The Three Primary Settings Explained:
WARM (145-165°F):
The warm setting maintains already-cooked food at a safe serving temperature. It is not intended for cooking raw food — it is a holding setting for food that has already completed its cooking cycle. Most programmable slow cookers automatically switch to warm when the programmed cooking time completes.
LOW (170-200°F):
The low setting is the heart of slow cooker cooking. At this temperature range, the slow cooker maintains a gentle simmer that breaks down collagen in tough cuts of meat over 6-10 hours, develops deep flavor in soups and stews, and produces the fall-apart tenderness that defines great slow cooker dishes. Low and slow is the fundamental principle of slow cooker cooking.
HIGH (200-280°F):
The high setting cooks food approximately twice as fast as low — typically 3-5 hours versus 6-10 hours on low. While convenient for faster preparation, high setting generally produces slightly less tender results for meat dishes because the faster cooking gives collagen less time to fully convert to gelatin.
The General Conversion Rule:
Most slow cooker recipes can be converted between settings:
- 1 hour on HIGH = approximately 2 hours on LOW
- This allows you to adapt recipes to your schedule without changing the final result significantly
Step-by-Step: How to Use a Slow Cooker for the First Time
Step 1: Choose the Right Ingredients
The slow cooker performs best with specific types of ingredients. Understanding which ingredients thrive and which struggle in the slow cooker environment prevents disappointment before you even begin.
Ideal Slow Cooker Ingredients:
- Tough cuts of meat: Chuck roast, pork shoulder, chicken thighs, lamb shanks, oxtail — the collagen-rich connective tissue in these cuts transforms into rich gelatin during extended low-heat cooking
- Root vegetables: Potatoes, carrots, parsnips, turnips, and sweet potatoes hold their structure during long cooking sessions
- Dried legumes: Beans and lentils cook perfectly in a slow cooker without pre-soaking in most cases
- Aromatics: Onions, garlic, and celery provide the flavor base for virtually every slow cooker dish
Ingredients to Handle Carefully:
- Chicken breasts: Overcook quickly — add in the final 2-3 hours rather than at the beginning
- Dairy (milk, cream, cheese): Curdle during extended cooking — add in the final 30 minutes only
- Delicate vegetables: Zucchini, peas, spinach, and fresh herbs turn mushy — add in the final 30-60 minutes
- Pasta and rice: Absorb too much liquid and become mushy — cook separately and add when serving
- Seafood: Overcooks rapidly — not appropriate for standard slow cooker cooking times
Step 2: Prepare and Layer Your Ingredients Correctly
The order in which you add ingredients to the slow cooker significantly affects the final result:
- Bottom layer — Root vegetables first: Carrots, potatoes, and other dense root vegetables go on the bottom where they receive the most direct heat. These cook more slowly than meat and need the longest exposure to heat
- Middle layer — Meat: Place your protein on top of the vegetables. The meat bastes in the vegetable juices beneath it while cooking
- Top layer — Aromatics and liquid: Onions, garlic, herbs, and cooking liquid go on top — they will sink and distribute throughout the cooking process
- Final additions: Reserve delicate vegetables, dairy, and fresh herbs for the final hour of cooking
Step 3: Add the Correct Amount of Liquid
This is the most commonly misunderstood aspect of how to use a slow cooker — and the source of the most common beginner mistake.
The Slow Cooker Liquid Rule:
The slow cooker is a sealed, moisture-retaining environment. Unlike stovetop cooking where liquid evaporates continuously, the slow cooker lid traps virtually all moisture — returning it to the food as condensation. This means:
- Use significantly less liquid than stovetop recipes specify — typically 50% less
- Meat releases its own juices during cooking — further increasing the liquid volume
- Vegetables release water as they cook — especially onions, tomatoes, and zucchini
General Liquid Guidelines:
- Soups and stews: Fill to within 1 inch of the lid maximum
- Braised meats: Liquid should reach halfway up the meat — not cover it completely
- Whole chicken: 1/2 to 1 cup of liquid is sufficient
- Bean dishes: Beans should be covered by approximately 1 inch of liquid
Step 4: Set the Correct Temperature and Time
The Slow Cooker Timing Guide:
| Food | Low Setting | High Setting |
|---|---|---|
| Whole chicken (3-4 lbs) | 6-8 hours | 3-4 hours |
| Chicken thighs | 6-8 hours | 3-4 hours |
| Chicken breasts | 4-6 hours | 2-3 hours |
| Chuck roast (3-4 lbs) | 8-10 hours | 4-6 hours |
| Pork shoulder (3-4 lbs) | 8-10 hours | 4-6 hours |
| Beef stew | 8-10 hours | 4-5 hours |
| Vegetable soup | 6-8 hours | 3-4 hours |
| Dried beans | 8-10 hours | 4-6 hours |
| Lentil soup | 6-8 hours | 3-4 hours |
| Bone broth | 18-24 hours | Not recommended |
Step 5: Resist the Urge to Lift the Lid
This is the most important operational rule for how to use a slow cooker effectively. Every time you lift the lid:
- The cooker loses the built-up heat and steam environment
- It takes approximately 20-30 minutes to return to the previous cooking temperature
- For a 3-hour recipe on high, one lid lift extends cooking time by 10% or more
The Rule: Do not lift the lid until the minimum cooking time has elapsed. Trust the process.
Step 6: Test for Doneness
Unlike oven cooking where time and temperature are precise predictors of doneness, slow cooker cooking has natural variation based on:
- The starting temperature of your ingredients (room temperature vs refrigerator cold)
- The specific wattage of your slow cooker model
- The exact size and shape of your protein
Testing Methods:
- For braised meats: Insert a fork and twist — properly cooked braised meat should shred effortlessly
- For whole proteins: Use a meat thermometer — chicken should reach 165°F, pork 145°F, beef varies by preference
- For vegetables: Pierce with a fork — they should be tender throughout
Step 7: The Final Finishing Techniques
The slow cooker produces extraordinarily tender, flavorful food — but it cannot produce the browned, caramelized exterior textures that high-heat cooking creates. These finishing techniques bridge the gap:
Thickening the Sauce:
Slow cooker dishes often produce more liquid than desired because of the moisture-retaining environment:
- Remove the lid and turn to HIGH for the final 30-60 minutes — evaporation thickens the liquid
- Mix 2 tablespoons cornstarch with 2 tablespoons cold water — stir into the slow cooker in the final 30 minutes
- Transfer the cooking liquid to a saucepan and reduce on the stovetop
Adding Browning:
For dishes that benefit from a browned, caramelized exterior:
- Transfer finished meat to a baking sheet
- Place under the broiler for 3-5 minutes until the surface caramelizes
- This technique is particularly effective for pulled pork, whole chicken, and braised short ribs
The 5 Best Slow Cooker Recipes for Beginners
Recipe 1: Classic Beef Chuck Roast
This is the definitive beginner slow cooker recipe — the dish that converts skeptics and demonstrates everything a slow cooker does best.
Ingredients:
- 3-4 lb beef chuck roast
- 4 medium carrots, cut into 2-inch pieces
- 4 medium potatoes, quartered
- 1 large onion, roughly chopped
- 4 garlic cloves, smashed
- 1 cup beef broth
- 2 tablespoons Worcestershire sauce
- 1 teaspoon dried thyme
- Salt and pepper
Method:
- Season the chuck roast generously with salt and pepper on all sides
- Optional but recommended: Sear the roast in a hot skillet with oil for 2-3 minutes per side until deeply browned
- Place carrots and potatoes on the bottom of the slow cooker
- Place the seared roast on top of the vegetables
- Add onion, garlic, broth, Worcestershire sauce, and thyme
- Cook on LOW for 8-10 hours or HIGH for 4-6 hours
- The roast is done when it shreds effortlessly with two forks
Recipe 2: Simple Pulled Pork
Ingredients:
- 3-4 lb pork shoulder
- 1 cup chicken broth
- 2 tablespoons brown sugar
- 1 tablespoon smoked paprika
- 1 teaspoon garlic powder
- 1 teaspoon onion powder
- Salt and pepper
Method:
- Mix brown sugar and all spices together to create a dry rub
- Coat the pork shoulder completely with the dry rub
- Place in the slow cooker and add chicken broth
- Cook on LOW for 8-10 hours
- Shred with two forks — the pork should fall apart effortlessly
- Mix shredded pork with the cooking juices before serving
Recipe 3: Easy Chicken Tortilla Soup
An Austin kitchen staple — perfect for Texas weather and endlessly customizable.
Ingredients:
- 1.5 lbs chicken thighs (boneless, skinless)
- 1 can diced tomatoes (14oz)
- 1 can black beans, drained (14oz)
- 1 can corn, drained (14oz)
- 1 cup chicken broth
- 1 packet taco seasoning
- Salt and pepper
Method:
- Place chicken thighs in the bottom of the slow cooker
- Add all remaining ingredients and stir to combine
- Cook on LOW for 6-8 hours or HIGH for 3-4 hours
- Shred the chicken directly in the slow cooker using two forks
- Serve with tortilla strips, sour cream, and fresh cilantro
Recipe 4: Classic Lentil Soup
The easiest and most nutritious slow cooker recipe for beginners — no meat, no pre-soaking, and virtually no preparation.
Ingredients:
- 2 cups dried green or brown lentils (rinsed)
- 1 large onion, diced
- 3 garlic cloves, minced
- 3 carrots, diced
- 3 celery stalks, diced
- 6 cups vegetable or chicken broth
- 1 teaspoon cumin
- 1 teaspoon smoked paprika
- Salt and pepper
Method:
- Add all ingredients to the slow cooker and stir to combine
- Cook on LOW for 8-10 hours or HIGH for 4-5 hours
- Use an immersion blender to blend approximately half the soup for a creamy texture while keeping some whole lentils for body
- Adjust seasoning and serve
Recipe 5: Overnight Steel-Cut Oatmeal
The slow cooker’s most underrated function — prepare overnight oatmeal before bed and wake up to a hot, ready breakfast.
Ingredients:
- 1 cup steel-cut oats
- 4 cups water
- 1 cup milk
- 2 tablespoons maple syrup or honey
- 1 teaspoon cinnamon
- Pinch of salt
Method:
- Spray the slow cooker insert lightly with cooking spray to prevent sticking
- Add all ingredients and stir to combine
- Cook on LOW for 7-8 hours overnight
- Wake up to perfectly cooked oatmeal — serve with fresh fruit and additional toppings
The “Often Overlooked” Slow Cooker Tips
The Pre-Sear Technique:
The most impactful upgrade to any slow cooker recipe is searing proteins in a hot skillet before adding them to the slow cooker. The Maillard reaction produced by high-heat searing creates hundreds of new flavor compounds that slow cooking alone cannot develop. In my Austin kitchen, I sear every piece of meat before slow cooking — the flavor difference is immediately perceptible.
The Slow Cooker Liner:
Slow cooker liners — disposable plastic bags that fit inside the ceramic insert — eliminate all cleanup from slow cooker cooking. Simply remove the liner and discard when cooking is complete. For busy households where cleanup time matters, liners transform the slow cooker from a convenient appliance into an almost zero-effort cooking system.
The Frozen Vegetable Trick:
Adding a bag of frozen vegetables in the final 30 minutes of cooking is the simplest way to add color, nutrition, and texture to any slow cooker dish without any additional preparation. Frozen peas, corn, and green beans work particularly well.
The Cold Start Warning:
Never place a cold ceramic insert directly into a preheated slow cooker base — thermal shock can crack the ceramic. Always allow the insert to come to room temperature before placing it in the base if it has been stored in the refrigerator.
Slow Cooker Timing and Temperature Guide Table
| Protein | Weight | Low Setting | High Setting | Done When |
|---|---|---|---|---|
| Whole chicken | 3-4 lbs | 6-8 hours | 3-4 hours | 165°F internal |
| Chicken thighs | 2 lbs | 6-8 hours | 3-4 hours | Falls from bone |
| Chuck roast | 3-4 lbs | 8-10 hours | 4-6 hours | Shreds easily |
| Pork shoulder | 3-4 lbs | 8-10 hours | 4-6 hours | Pulls apart |
| Pork chops | 1.5 lbs | 6-8 hours | 3-4 hours | 145°F internal |
| Lamb shanks | 2 lbs | 8-10 hours | 5-6 hours | Falls from bone |
| Dried beans | 2 cups | 8-10 hours | 4-6 hours | Tender throughout |
| Lentils | 2 cups | 6-8 hours | 3-4 hours | Soft and tender |
| Vegetable soup | N/A | 6-8 hours | 3-4 hours | Vegetables tender |
| Steel-cut oats | 1 cup | 7-8 hours | N/A | Creamy texture |
Common Mistakes When Using a Slow Cooker
When learning how to use a slow cooker, avoid these errors:
- Using too much liquid: The slow cooker retains all moisture — significantly less liquid than stovetop recipes is always required
- Lifting the lid during cooking: Every lid lift adds 20-30 minutes to the cooking time — resist until the minimum time has elapsed
- Using the wrong cuts of meat: Lean, tender cuts like chicken breasts and pork tenderloin overcook in the slow cooker — always choose tough, collagen-rich cuts
- Overfilling the insert: Fill between half and two-thirds full for optimal cooking — overfilling prevents proper heat circulation
- Starting with frozen meat: Frozen meat heats too slowly through the temperature danger zone — always thaw completely before slow cooking
- Skipping the pre-sear: While not required, searing meat before slow cooking produces dramatically better flavor — it is worth the extra 10 minutes
- Cooking dairy products for the full duration: Milk, cream, and cheese curdle with extended heat — always add in the final 30 minutes
Sarah’s Final Advice
Mastering how to use a slow cooker is about understanding two fundamental principles: less liquid than you think and more time than you expect. The slow cooker rewards patience — dishes cooked for the full recommended time consistently outperform those rushed on the high setting. And the liquid lesson, once learned, transforms every slow cooker recipe from watery and bland to rich and intensely flavored.
In my Austin kitchen, Sunday is slow cooker day. I load the slow cooker in the morning before church, farmer’s market, or weekend activities — and return home to a kitchen filled with extraordinary aromas and a meal that requires nothing more than 5 minutes of finishing before serving. That combination of minimal effort and maximum reward is why the slow cooker remains one of the most valuable appliances in any efficient kitchen.
For slow cooker equipment recommendations, see my Best Slow Cooker 2026 for the top models I recommend. For an impressive slow cooker project to try once you have mastered the basics, see my Bone Broth Recipe for a complete slow cooker bone broth guide.
Shop the Slow: Sarah’s Slow Cooker Essentials
1. Ninja Foodi PossibleCooker Pro (8.5-Quart)
My top slow cooker recommendation for beginners in 2026. The stovetop-safe vessel eliminates the need for a separate searing pan — you can brown your meat and slow cook it in the same vessel. The 8.5-quart capacity handles every recipe in this guide with room to spare.
[Check Price on Amazon]
2. Reynolds Kitchens Slow Cooker Liners (Regular Size, 6 Count)
The most underrated slow cooker accessory available. These disposable liners eliminate all slow cooker cleanup — simply remove and discard after cooking. For busy households where the cleanup barrier prevents regular slow cooker use, liners are a complete game-changer.
[Check Price on Amazon]
3. Instant-Read Meat Thermometer (Digital)
Essential for confirming doneness in slow cooker recipes where visual cues can be misleading. A digital instant-read thermometer eliminates guesswork and ensures food safety — particularly important for whole chickens and large pork roasts that are difficult to assess by texture alone.
[Check Price on Amazon]