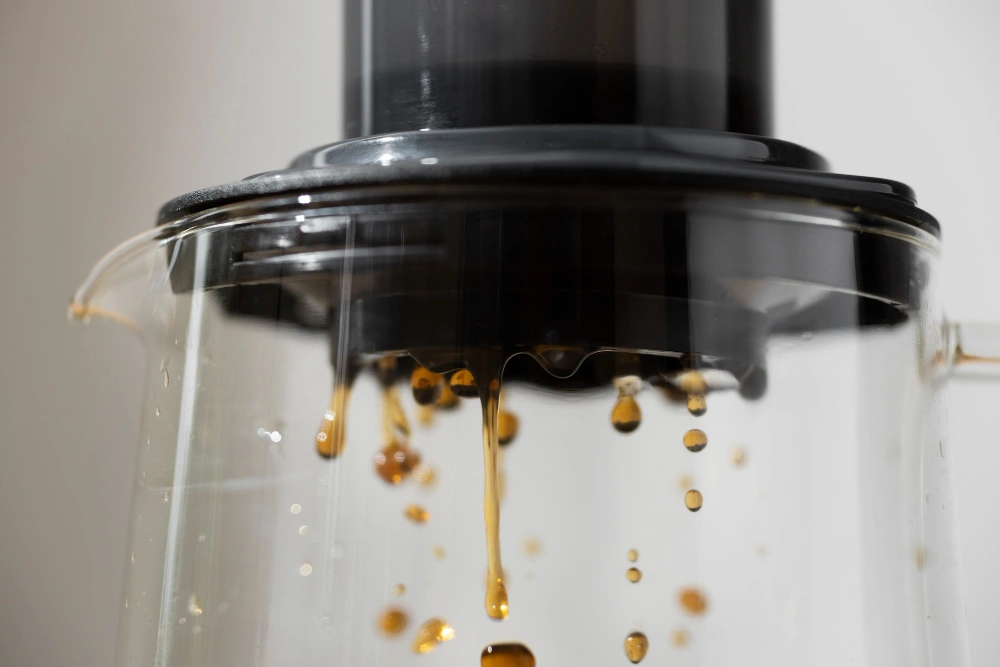
If your Keurig is brewing slower than usual, producing coffee that tastes bitter or weak, or displaying that persistent descale light on the control panel, you need to know how to descale a Keurig immediately. Mineral deposits from hard water accumulate inside your coffee maker over time, coating the internal heating element, water lines, and needle with a thick layer of calcium and magnesium scale that progressively destroys both the flavor of your coffee and the lifespan of your machine.
As a kitchen efficiency expert based in Austin, Texas, I consider Keurig descaling one of the most critical and most neglected maintenance tasks in the modern kitchen. Austin has notoriously hard water, which means my Keurig accumulates mineral deposits significantly faster than machines in softer water areas. I have personally tested every descaling method available in 2026 — from white vinegar to official Keurig descaling solution to citric acid alternatives — and this guide covers everything you need to know about how to descale a Keurig correctly, safely, and effectively.
Here is my complete, tested guide on how to descale a Keurig using five proven methods that work across every Keurig model including the Slim, Duo, K-Express, K-Supreme, and classic K-Series machines.
Table of Contents
Why Descaling Your Keurig Is Non-Negotiable
Before we tackle how to descale a Keurig, it is essential to understand what scale buildup actually does to your machine and your coffee.
The Science of Scale Buildup:
Hard water contains dissolved calcium and magnesium minerals. Every time your Keurig heats water, these minerals precipitate out of solution and deposit on every internal surface they contact. Over weeks and months, this builds into a thick, rock-hard coating called limescale that:
- Reduces heating efficiency: The heating element must work harder to heat water through the insulating scale layer, consuming more electricity and taking longer to reach brewing temperature
- Restricts water flow: Scale narrows the internal water lines, reducing water pressure and producing incomplete, weak brews
- Harbors bacteria: The rough, porous surface of limescale provides an ideal environment for bacteria and mold to colonize
- Destroys coffee flavor: Water forced through scale-coated surfaces picks up a distinctly bitter, metallic taste that no amount of premium coffee can overcome
The Warning Signs Your Keurig Needs Descaling:
- The descale indicator light is illuminated on the control panel
- Brewing cycle takes noticeably longer than when the machine was new
- Coffee tastes bitter, metallic, or noticeably weaker than usual
- The machine produces less coffee volume per pod than specified
- Unusual gurgling or sputtering sounds during the brew cycle
- The machine stops mid-brew and requires restarting
How Often Should You Descale Your Keurig:
| Water Type | Descaling Frequency |
|---|---|
| Very Hard Water (Austin, Phoenix, Las Vegas) | Every 1-2 months |
| Hard Water (Most US cities) | Every 2-3 months |
| Moderately Hard Water | Every 3-4 months |
| Soft Water or Filtered Water | Every 6 months |
| Distilled Water Only | Every 6-12 months |
Method 1: The Official Keurig Descaling Solution Method (The Recommended Approach)
This is Keurig’s officially recommended answer to how to descale a Keurig and the method that maintains your warranty coverage.
The Science:
Keurig’s proprietary descaling solution contains a blend of citric acid and other descaling agents specifically formulated for the internal components of Keurig machines. Unlike white vinegar, it leaves no residual odor or taste and is pH-balanced to avoid damaging internal seals and gaskets over repeated use.
What You Need:
- 1 bottle Keurig Descaling Solution
- Fresh water
- Large ceramic mug (14oz or larger)
- Access to a sink
The 2026 Method:
- Power off your Keurig and remove the water filter from the reservoir if one is installed
- Empty the water reservoir completely and remove any remaining water
- Pour the entire bottle of Keurig Descaling Solution into the empty water reservoir
- Fill the empty descaling solution bottle with fresh water and add that to the reservoir as well (equal parts solution and water)
- Place your large ceramic mug on the drip tray
- Power the machine on and ensure no pod is inserted in the K-Cup holder
- Initiate descale mode:
- K-Supreme/K-Supreme Plus: Hold the 8oz and 12oz buttons simultaneously for 3 seconds
- Keurig Slim: Hold the 8oz button for 3 seconds
- Keurig Duo: Press the descale button on the control panel
- Classic K-Series: Lift and lower the handle, then select the largest brew size
- Run continuous brew cycles, emptying the mug into the sink after each cycle, until the ADD WATER light illuminates
- Allow the machine to stand for 30 minutes with the power on (this soaking period is critical — do not skip it)
- After 30 minutes, remove and rinse the water reservoir thoroughly
- Fill the reservoir with fresh water to the MAX fill line
- Run a minimum of 12 fresh water rinse cycles to completely flush all descaling solution residue
Why It Works:
The citric acid in the descaling solution chelates (chemically bonds with) calcium and magnesium mineral deposits, breaking them away from internal surfaces and suspending them in the liquid for flushing. The 30-minute soak allows the solution to penetrate and dissolve stubborn scale deposits that a single pass cycle cannot reach.
Best For: All Keurig models. The safest method for maintaining warranty coverage and protecting internal components long-term.
Related Guide: See my Best Coffee Makers Under $100 2026 for recommendations on upgrading your coffee setup after descaling restores your machine’s performance.
Method 2: The White Vinegar Method (The Natural Alternative)
This is the most searched natural answer to how to descale a Keurig and works effectively for regular maintenance descaling.
What You Need:
- White distilled vinegar (minimum 5% acidity)
- Fresh water
- Large ceramic mug
The 2026 Method:
- Empty and remove the water reservoir
- Remove and set aside the water filter if installed (vinegar can damage filter media)
- Fill the water reservoir with undiluted white vinegar to the MAX fill line
- Place your large mug on the drip tray with no pod inserted
- Run continuous brew cycles on the largest size setting, emptying the mug after each cycle
- When the reservoir is approximately half empty, stop and allow the machine to sit for 45 minutes to 1 hour (the extended soak is essential for vinegar effectiveness)
- Resume brew cycles until the reservoir is completely empty and the ADD WATER light appears
- Rinse the reservoir thoroughly with fresh water
- Fill to the MAX line with fresh water and run a minimum of 12 rinse cycles
- Run an additional 4-6 rinse cycles beyond what seems necessary — vinegar residue is persistent and will affect coffee flavor if not completely flushed
Why It Works:
The acetic acid in white vinegar dissolves calcium carbonate (the primary component of limescale) through an acid-base chemical reaction. The resulting calcium acetate is water-soluble and flushes cleanly through the machine during rinse cycles.
The Vinegar Reality Check:
White vinegar is effective but has two significant limitations compared to the official descaling solution:
- Residual odor: Requires significantly more rinse cycles to completely eliminate vinegar taste and smell from subsequent brews
- Warranty concerns: Keurig’s official position is that white vinegar is not recommended and may affect warranty coverage
Pro Tip from Sarah:
In my Austin kitchen, I add a tablespoon of baking soda to the first rinse cycle after the vinegar descaling. This neutralizes residual acidity and dramatically reduces the number of rinse cycles needed to eliminate vinegar taste from the machine.
Best For: Regular maintenance descaling every 2-3 months when the official solution is unavailable. Budget-friendly and highly effective for light to moderate scale buildup.
Related Guide: See my [How to Clean a Coffee Maker] for complementary coffee maker maintenance techniques.
Method 3: The Citric Acid Method (The Professional’s Choice)
For serious coffee enthusiasts who want the effectiveness of commercial descaling without the cost, citric acid powder is the professional answer to how to descale a Keurig.
What You Need:
- 1-2 tablespoons food-grade citric acid powder
- Fresh water
- Large ceramic mug
The 2026 Method:
- Dissolve 1 tablespoon of citric acid powder in the full reservoir of water (approximately 40-48oz)
- Stir until completely dissolved — undissolved crystals can clog internal components
- Empty the reservoir and refill with the citric acid solution
- Follow the same process as Method 1 (continuous brew cycles, 30-minute soak, thorough rinsing)
- Run 8-10 rinse cycles with fresh water after descaling
Why It Works:
Citric acid is the active descaling ingredient in most commercial coffee machine descalers including the official Keurig solution. Purchasing food-grade citric acid powder separately costs approximately $0.10 per descaling session compared to $6-8 for the official solution — a 98% cost reduction for identical chemical effectiveness.
The Cost Comparison:
| Method | Cost Per Session | Effectiveness | Warranty Safe |
|---|---|---|---|
| Keurig Official Solution | $6-8 | Excellent | Yes |
| White Vinegar | $0.25 | Good | No |
| Citric Acid Powder | $0.10 | Excellent | Comparable |
| Lemi Shine | $0.50 | Very Good | Comparable |
Best For: Regular descalers who want professional-grade results at a fraction of the cost of the official solution.
Method 4: The Lemi Shine Method (The Hard Water Specialist)
For Keurig owners in extremely hard water areas like Austin, Phoenix, or Las Vegas, Lemi Shine Booster is the most powerful answer to how to descale a Keurig with severe mineral buildup.
What You Need:
- 1 tablespoon Lemi Shine Booster (dishwasher additive)
- Fresh water
- Large ceramic mug
The 2026 Method:
- Dissolve 1 tablespoon of Lemi Shine in a full reservoir of water
- Stir thoroughly until completely dissolved
- Run the same continuous brew cycle process as Method 1
- Allow a 45-minute soak period for severe scale buildup
- Run 10-12 fresh water rinse cycles after descaling
Why It Works:
Lemi Shine contains a high-concentration citric acid formula specifically developed for hard water conditions. It is significantly more aggressive than standard citric acid solutions, making it the preferred choice for machines in areas with very hard water or machines that have not been descaled in over 6 months.
Pro Tip from Sarah:
Living in Austin with some of the hardest municipal water in Texas, Lemi Shine is my personal go-to descaling solution. I descale every 6 weeks during summer when our water usage increases and the mineral concentration in Austin’s water supply peaks.
Best For: Keurig machines in hard water areas or machines with severe scale buildup from extended periods without descaling.
Method 5: The Preventive Maintenance Method (The Efficiency Approach)
The most efficient answer to how to descale a Keurig is preventing heavy scale buildup from occurring in the first place.
The 2026 Prevention Strategy:
Use Filtered Water:
Installing a Keurig water filter in your reservoir (compatible with most models) removes a significant portion of dissolved minerals before they enter the heating system. Replace the filter every 2 months or 60 tank refills.
The Partial Vinegar Maintenance Flush:
Instead of waiting for the descale light to appear, run this monthly mini-maintenance:
- Fill the reservoir with a 50/50 mixture of white vinegar and water (instead of full strength)
- Run 3-4 brew cycles
- Follow with 6 fresh water rinse cycles
- Total time: 20 minutes
- This prevents heavy scale accumulation and eliminates the need for intensive descaling sessions
The Weekly Reservoir Clean:
- Empty and rinse the reservoir with warm water weekly
- Allow to air dry completely before refilling
- This prevents algae and mold growth that accelerates scale adhesion to internal surfaces
Why Prevention Wins:
A Keurig that is never allowed to accumulate heavy scale buildup brews consistently better coffee, uses less electricity, and lasts significantly longer than a machine subjected to infrequent intensive descaling. Prevention is the highest-ROI maintenance strategy available.
Best For: All Keurig owners who want to minimize descaling frequency and maximize machine lifespan and coffee quality.
The “Often Forgotten” Keurig Maintenance Tasks
A complete guide on how to descale a Keurig must include these frequently overlooked maintenance components:
The Needle Cleaning (Critical):
The entry and exit needles that puncture K-Cup pods accumulate coffee grounds and oils that descaling solution cannot reach. Keurig provides a needle cleaning tool with most 2026 models.
The Method:
- Power off and unplug the machine
- Open the K-Cup holder and locate the exit needle at the bottom
- Use the Keurig needle cleaning tool (or a straightened paperclip) to clear the needle hole
- Rinse the tool and repeat for the entry needle at the top of the holder
- Run 2 water-only brew cycles to flush dislodged debris
- Clean needles every 3-6 months or when grounds appear in your coffee
The Drip Tray:
Remove and wash the drip tray with warm soapy water weekly. Coffee oils accumulate rapidly and create a sticky, bacteria-friendly surface.
The Exterior:
Wipe the exterior with a damp microfiber cloth weekly. Pay special attention to the area around the K-Cup holder where coffee splatter accumulates.
The Water Reservoir:
Wash with warm soapy water monthly. Never put the reservoir in the dishwasher — the high heat can warp the plastic and compromise the seal.
Descaling Methods Comparison Table
| Method | Cost | Time Required | Effectiveness | Warranty Safe | Best For |
|---|---|---|---|---|---|
| Keurig Official Solution | $6-8 | 1.5-2 hours | Excellent | Yes ✅ | All models, warranty protection |
| White Vinegar | $0.25 | 2-2.5 hours | Good | No ⚠️ | Budget maintenance |
| Citric Acid Powder | $0.10 | 1.5-2 hours | Excellent | Comparable | Cost-conscious regular descalers |
| Lemi Shine | $0.50 | 2 hours | Very Good | Comparable | Hard water areas |
| Preventive Method | $0.10 | 20 minutes monthly | Excellent | Yes ✅ | All owners for prevention |
Sarah’s Keurig Descaling Schedule (Austin Hard Water Edition)
Since Austin has notoriously hard water, here is the exact maintenance schedule I follow for my Keurig:
Every 6 Weeks:
- Full descaling session using Lemi Shine method
- Needle cleaning with Keurig tool
- Full reservoir wash and air dry
Every 2 Weeks:
- Drip tray removal and washing
- Exterior wipe down with damp microfiber cloth
- Quick reservoir rinse
Weekly:
- Empty and rinse reservoir
- Wipe K-Cup holder area
- Check drip tray for overflow
Every 2 Months:
- Replace water filter cartridge
- Inspect water reservoir seal for cracks or discoloration
- Run preventive 50/50 vinegar flush if full descaling is not due
Common Mistakes When Descaling a Keurig
When learning how to descale a Keurig, avoid these errors:
- Skipping the soak period: The 30-45 minute rest period is where most of the descaling chemistry actually happens — skipping it reduces effectiveness by approximately 60%
- Not running enough rinse cycles: 12 rinse cycles is the minimum — coffee will taste of vinegar or descaling solution if you stop at 4-6 cycles
- Leaving the water filter in during descaling: Descaling solution and vinegar damage the filter media and must be removed before every descaling session
- Using apple cider vinegar instead of white vinegar: Apple cider vinegar contains sugars and other compounds that leave residue inside the machine
- Ignoring the needle cleaning: Descaling addresses mineral deposits but does nothing for coffee ground clogs in the needles — both tasks are required for complete maintenance
- Waiting for the descale light: By the time the descale light appears, significant scale buildup has already occurred — proactive maintenance prevents this level of accumulation
Sarah’s Final Advice
Mastering how to descale a Keurig is about establishing a consistent schedule rather than reacting to problems after they develop. The descale light appearing is your machine telling you it is already struggling — the goal is to never reach that point.
For Austin residents and anyone in a hard water area, descale every 6 weeks without exception. For softer water areas, every 3 months is sufficient. The official Keurig Descaling Solution is the safest choice for warranty protection, while citric acid powder delivers identical results at a fraction of the cost for those whose warranties have expired.
A properly maintained Keurig produces noticeably better coffee, brews faster, uses less electricity, and lasts years longer than a neglected machine. The 90 minutes required for a complete descaling session is one of the highest-ROI maintenance tasks in your entire kitchen.
For more kitchen appliance maintenance guides, see my Best Coffee Makers Under $100 2026 or explore my complete Kitchen Appliance Maintenance Guide for a full schedule of appliance care routines across your entire kitchen.
Shop the Descale: Sarah’s Keurig Maintenance Kit
1. Keurig Descaling Solution (2-Pack)
The official Keurig-approved descaling solution that maintains warranty coverage and delivers consistent results across all Keurig models. My first recommendation for anyone whose machine is still under warranty.
[Check Price on Amazon]
2. Food Grade Citric Acid Powder (1lb Bag)
The professional cost-effective alternative to commercial descaling solutions. One pound provides approximately 20-25 descaling sessions at a fraction of the cost of single-use solutions. My personal choice for out-of-warranty machines.
[Check Price on Amazon]
3. Keurig Water Filter Replacement Cartridges (6-Pack)
Reduces mineral content in your water before it enters the heating system, dramatically extending the time between descaling sessions. Essential for hard water areas like Austin, Phoenix, and Las Vegas.
[Check Price on Amazon]