If your kitchen knives are sliding off tomato skins instead of slicing through them, crushing herbs instead of cutting them cleanly, or requiring excessive force to cut through basic vegetables, you need to know how to sharpen a knife properly. A dull knife is not just frustrating — it is genuinely dangerous. Counter-intuitively, dull knives cause significantly more kitchen injuries than sharp ones because they require the force and pressure that causes slipping and loss of control during cutting.
As a kitchen efficiency expert based in Austin, Texas, I consider sharp kitchen knives the foundation of an efficient cooking experience. In my Austin kitchen, I maintain my knife edges on a weekly basis using a honing steel and perform a full sharpening session every 2-3 months depending on usage intensity. The difference between a properly sharpened knife and a dull one is not subtle — a sharp knife makes every cutting task faster, safer, and more enjoyable in a way that transforms the experience of cooking from a chore into a pleasure.
Here is my complete, tested guide on how to sharpen a knife using five proven methods that cover every skill level, every budget, and every type of kitchen knife from a basic chef’s knife to a delicate Japanese santoku.
Table of Contents
Why Knife Sharpening Matters More Than You Think
Before we dive into how to sharpen a knife, it is worth understanding the science behind knife edges and why even quality knives require regular maintenance to perform at their best.
The Science of a Knife Edge:
A kitchen knife edge is a V-shaped wedge of metal ground to a microscopically thin apex. This apex — the actual cutting edge — is so thin that it is measured in microns. During normal use, this thin metal apex bends, rolls, and chips at a microscopic level with every cut. Over time, these micro-deformations accumulate until the edge no longer makes clean contact with food — producing the dull, sliding performance that characterizes a neglected knife.
The Difference Between Honing and Sharpening:
This is the most important — and most commonly confused — distinction in knife maintenance:
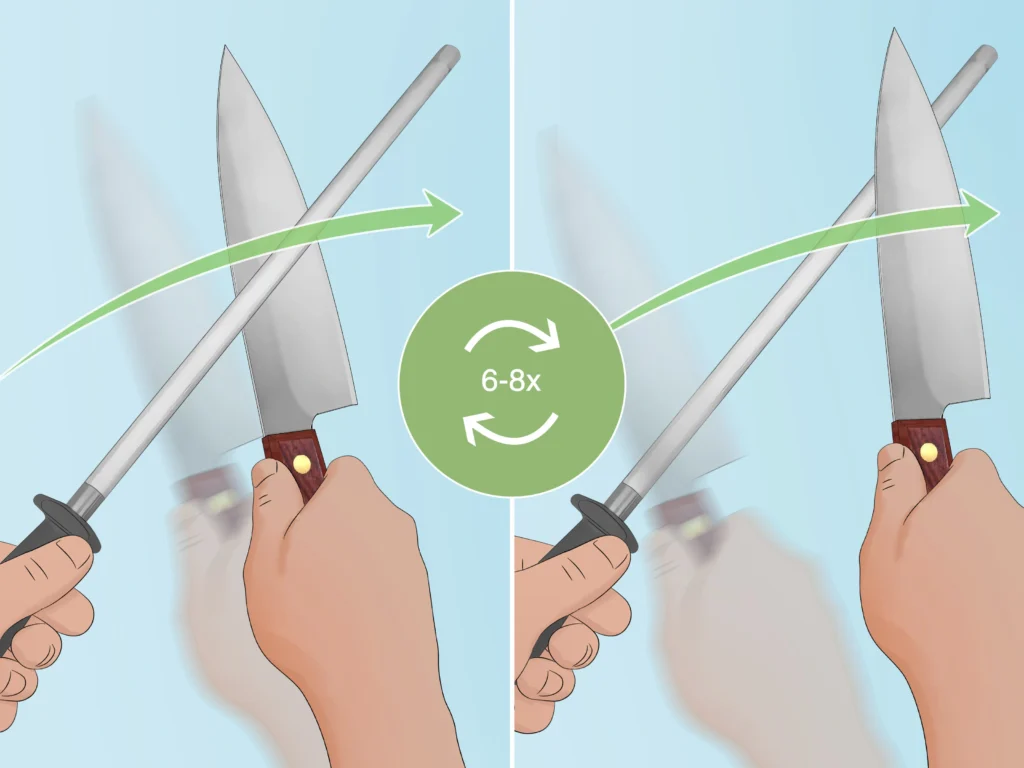
- Honing: Realigns the existing edge without removing metal. A honing steel straightens the rolled and bent apex back into alignment. Honing restores the edge that is already there but has been displaced through use. Honing should be done frequently — before every use for professional cooks, weekly for home cooks
- Sharpening: Removes metal from the blade to create a new edge. A whetstone, electric sharpener, or pull-through sharpener grinds away metal to reveal a fresh, sharp apex. Sharpening is required when honing no longer restores cutting performance — typically every 2-6 months depending on use frequency
The Warning Signs Your Knife Needs Sharpening:
- The knife slides off a tomato skin rather than biting in immediately
- You need to apply pressure to cut through soft vegetables like onions
- The knife tears herbs rather than cutting them cleanly
- A sheet of paper tears unevenly rather than cutting cleanly when the blade is drawn across it
- The knife edge reflects light evenly along its entire length (a sharp edge is too thin to reflect light)
The Paper Test:
Hold a sheet of printer paper at the top and draw the knife downward along the edge. A sharp knife cuts cleanly and smoothly. A dull knife tears, catches, or slides without cutting. This simple test gives you an immediate assessment of your knife’s sharpness before and after sharpening.
Western vs Japanese Knife Edges:
| Type | Edge Angle | Sharpening Method | Best For |
|---|---|---|---|
| Western/European | 20-25° per side | Any method | Robust cutting tasks |
| Japanese | 10-15° per side | Whetstone preferred | Precision slicing |
| Asian Hybrid | 15-17° per side | Whetstone or careful electric | Versatile cooking |
Method 1: The Whetstone Method (The Professional Standard)
The whetstone method is the most precise and most effective answer to how to sharpen a knife and the preferred method of professional chefs and serious home cooks worldwide.
The Science:
A whetstone is an abrasive block that removes metal from the knife blade in a controlled manner, grinding away the old, damaged edge and revealing a fresh, sharp apex. Different grit levels remove different amounts of metal — coarse grits remove metal quickly for very dull knives, while fine grits polish and refine the edge to a razor-sharp finish.
Understanding Whetstone Grits:
| Grit | Purpose | When to Use |
|---|---|---|
| 120-400 (Coarse) | Major edge repair | Chipped, damaged, or extremely dull blades |
| 800-1000 (Medium) | Primary sharpening | Regular sharpening sessions |
| 2000-3000 (Medium-Fine) | Edge refinement | After medium grit sharpening |
| 4000-6000 (Fine) | Edge polishing | Final polish for very sharp edge |
| 8000+ (Extra Fine) | Mirror polish | Professional finishing for Japanese knives |
What You Need:
- Whetstone (1000/6000 combination stone recommended for beginners)
- Water or honing oil (check stone manufacturer’s recommendation)
- Damp cloth or non-slip mat
- Angle guide (optional but recommended for beginners)
The 2026 Method:
- Soak a water stone in water for 5-10 minutes before use (oil stones require honing oil — never use water on an oil stone)
- Place the stone on a damp cloth or non-slip mat on a stable surface
- Determine your knife’s correct sharpening angle:
- Western knives: 20 degrees per side
- Japanese knives: 15 degrees per side
- If unsure: use 20 degrees as a safe starting point
- Hold the knife handle in your dominant hand with your thumb on the spine and fingers on the handle
- Place the blade on the stone at the correct angle — a useful reference is that 20 degrees is approximately the thickness of two stacked quarters placed under the spine
- Place the fingertips of your non-dominant hand on the flat of the blade to apply even pressure
- Draw the blade across the stone in a smooth, arcing motion — moving from the heel of the blade at the base of the stone to the tip of the blade at the top of the stone
- Maintain consistent angle throughout the entire stroke — angle consistency is more important than the exact angle chosen
- Apply moderate pressure on the forward stroke, light pressure on the return
- Complete 10 strokes on one side before switching to the other side
- Check for a burr — a slight roughness you can feel with your fingertip running perpendicular to the edge indicates you have sharpened sufficiently on that side
- Switch sides and complete 10 strokes
- Move to a finer grit stone and repeat with lighter pressure for 5-10 strokes per side
- Strop the finished edge on a leather strop or cardboard to remove any remaining burr
- Test sharpness with the paper test
The Learning Curve Reality:
Whetstone sharpening requires practice to master. Your first session will likely produce adequate but not excellent results. By your third or fourth session, maintaining consistent angle becomes natural and results improve dramatically. Commit to the learning curve — the whetstone method produces the best possible edge of any sharpening method.
Best For: All knife types. Particularly recommended for Japanese knives where precise angle control is essential. Best long-term investment in knife maintenance.
Related Guide: See my Best Kitchen Knife Sets 2026 for the knives that most benefit from professional whetstone sharpening.
Method 2: The Electric Knife Sharpener Method (The Fast Method)
For home cooks who want sharp knives without the learning curve of whetstone sharpening, an electric knife sharpener is the fastest and most accessible answer to how to sharpen a knife effectively.
The Science:
Electric knife sharpeners use motorized abrasive wheels or diamond-coated discs that spin at high speed to grind the knife edge. The knife is drawn through pre-set angle slots that maintain consistent sharpening angle automatically — eliminating the primary skill requirement of whetstone sharpening.
What You Need:
- Electric knife sharpener (Chef’sChoice or comparable quality brand)
- Clean dry knife
The 2026 Method:
- Ensure the knife blade is completely dry before sharpening — water on the blade can cause uneven sharpening on electric systems
- Start with the coarsest slot if the knife is very dull, or the medium slot for regular maintenance sharpening
- Hold the sharpener firmly on a stable surface
- Place the heel of the knife blade in the sharpening slot at the base
- Draw the knife through the slot using light, consistent pressure — let the sharpener’s abrasive wheels do the work
- Move from heel to tip in a single smooth stroke
- Complete 3-6 passes through the coarse slot for a dull knife
- Move to the medium slot and complete 3-4 passes
- Finish with 2-3 passes through the fine/honing slot
- Wipe the blade clean with a damp cloth to remove metal filings
- Test with the paper test
The Electric Sharpener Limitation:
Electric sharpeners remove more metal per session than whetstones — producing a sharp edge quickly but shortening the knife’s lifespan over years of repeated sharpening. For expensive Japanese knives, a whetstone is always preferred. For everyday Western kitchen knives, an electric sharpener provides an excellent balance of convenience and results.
Best For: Western kitchen knives. Home cooks who want sharp knives without investing time in whetstone technique. Regular quick maintenance sharpening.
Method 3: The Honing Steel Method (The Maintenance Method)
The honing steel is not a sharpening tool — it is a maintenance tool. But understanding how to use a honing steel correctly is the single most important factor in how long your knife stays sharp between sharpening sessions.
The Science:
A honing steel realigns the microscopic apex of the knife edge that has been bent and displaced during normal cutting use. No metal is removed — the steel simply straightens the existing edge back into its correct alignment. A properly honed knife that has not been sharpened in months often performs as well as a freshly sharpened knife that has never been honed.
Types of Honing Steels:
| Type | Surface | Effect | Best For |
|---|---|---|---|
| Smooth Steel | Polished metal | Gentle realignment | Japanese knives, fine edges |
| Ridged Steel | Grooved metal | More aggressive realignment | Western knives |
| Diamond Steel | Diamond coating | Light metal removal + alignment | Very dull edges |
| Ceramic Rod | Ceramic material | Between honing and sharpening | All knife types |
What You Need:
- Honing steel appropriate for your knife type
- Stable surface or cutting board
The 2026 Method (Stationary Steel Technique):
- Hold the honing steel vertically with the tip resting on a folded kitchen towel on the cutting board
- Hold the knife in your dominant hand at the correct angle (20 degrees for Western, 15 degrees for Japanese)
- Place the heel of the knife at the top of the steel
- Draw the knife downward along the steel while simultaneously pulling toward you — moving from heel to tip in a smooth arc
- Complete 4-6 strokes on each side alternating between sides
- Wipe the blade clean after honing
Honing Frequency:
| Usage Level | Honing Frequency |
|---|---|
| Professional kitchen | Before every use |
| Daily home cook | Every 2-3 uses |
| Regular home cook | Weekly |
| Occasional cook | Before each cooking session |
Best For: All knife types as a regular maintenance practice between sharpening sessions. The single most effective habit for maintaining knife sharpness long-term.
Method 4: The Pull-Through Sharpener Method (The Beginner Method)
For absolute beginners who want a functional sharp knife with zero technique requirements, a manual pull-through sharpener is the most accessible answer to how to sharpen a knife at home.
The Science:
Pull-through sharpeners use fixed V-shaped carbide or ceramic rods that the knife edge contacts as it is drawn through the slot. The fixed angle of the rods determines the sharpening angle — requiring no skill or angle judgment from the user.
What You Need:
- Manual pull-through sharpener
- Stable surface
The 2026 Method:
- Place the pull-through sharpener on a stable, non-slip surface
- Hold the sharpener firmly with your non-dominant hand
- Place the heel of the knife blade in the sharpening slot
- Apply light downward pressure and draw the knife through the slot from heel to tip in one smooth motion
- Complete 3-5 pulls through the coarse slot for a dull knife
- Complete 3-5 pulls through the fine slot for edge refinement
- Wipe the blade clean to remove metal filings
The Pull-Through Sharpener Reality:
Pull-through sharpeners are the least precise sharpening method reviewed. They remove significant amounts of metal aggressively — shortening knife lifespan with repeated use. The fixed angle cannot accommodate the variety of edge angles used by different knife manufacturers. For inexpensive knives and absolute beginners, they provide an acceptable quick fix. For quality knives, a whetstone or electric sharpener is always preferred.
Best For: Budget kitchen knives. Absolute beginners who need a functional edge immediately. Emergency sharpening when other tools are unavailable.
Method 5: The Professional Sharpening Service (The Outsourcing Method)
Sometimes the best answer to how to sharpen a knife is knowing when to let a professional handle it — particularly for expensive Japanese knives, damaged edges, or knives that require significant metal removal.
When to Use a Professional Sharpening Service:
- Chipped or damaged edges: A chip in the knife edge requires significant metal removal to grind past the damage — a task that takes considerable whetstone time or risks damaging the knife with an electric sharpener
- Expensive Japanese knives: Premium Japanese knives with thin 10-15 degree edges deserve the precision of a professional hand sharpener who specializes in Japanese blade geometry
- Unknown edge angle: If you inherited knives or purchased second-hand and do not know the original edge angle, a professional can assess and restore the correct geometry
- Annual maintenance: Even knives you maintain yourself benefit from an annual professional sharpening to restore the original factory geometry
Finding a Quality Sharpening Service in Austin:
In Austin, quality professional knife sharpening is available at:
- Specialty kitchen stores that offer sharpening services
- Japanese knife specialty retailers
- Local farmers market vendors who offer sharpening services
- Mobile knife sharpening services that come to your door
Cost Guide:
| Service | Typical Cost | Turnaround |
|---|---|---|
| Basic chef’s knife | $5-10 | Same day |
| Japanese knife | $10-20 | 1-3 days |
| Full knife set (6 knives) | $30-60 | Same day |
| Damaged/chipped repair | $15-30 | 1-3 days |
Best For: Expensive Japanese knives, chipped or damaged edges, annual geometry restoration, and anyone who wants professional results without investing in sharpening equipment.
The “Often Overlooked” Knife Sharpening Factors
A complete guide on how to sharpen a knife must address these frequently overlooked considerations:
The Knife Steel Matters:
- Soft steel (German knives like Wüsthof, Henckels): Rolls easily, requires frequent honing, sharpens easily on any system
- Hard steel (Japanese knives like Shun, Global): Holds edge longer, requires less frequent honing, chips rather than rolls, requires careful sharpening at correct angle
The Cutting Surface Matters:
The surface you cut on dramatically affects how quickly your knife dulls:
- Wood cutting boards: Gentle on edges — the best surface for knife longevity
- Plastic cutting boards: Acceptable for knife edges
- Glass or ceramic cutting boards: Destroys knife edges immediately — never use these
- Granite or stone countertops: Ruins knife edges instantly
The Storage Method Matters:
How you store knives between uses affects edge longevity:
- Knife block: Protects edges if knives are inserted spine-first
- Magnetic knife strip: Excellent edge preservation — edges never contact hard surfaces
- Knife drawer: Damages edges through contact with other utensils — use blade guards if storing in drawers
- Dishwasher: Destroys knife edges through vibration and harsh detergent — always hand wash quality knives
Knife Sharpening Methods Comparison Table
| Method | Skill Required | Time Required | Edge Quality | Metal Removal | Cost |
|---|---|---|---|---|---|
| Whetstone | High | 15-30 minutes | Excellent ⭐⭐⭐⭐⭐ | Controlled | $30-100 |
| Electric Sharpener | Very Low | 2-5 minutes | Very Good ⭐⭐⭐⭐ | High | $30-150 |
| Honing Steel | Low | 1-2 minutes | Good (maintenance) ⭐⭐⭐ | None | $20-80 |
| Pull-Through | None | 1-2 minutes | Adequate ⭐⭐ | Very High | $10-40 |
| Professional Service | None | Drop off/pick up | Excellent ⭐⭐⭐⭐⭐ | Professional | $5-30 |
Sarah’s Knife Maintenance Schedule
Before Every Cooking Session:
- 4-6 passes on the honing steel for frequently used knives
- Quick paper test to assess sharpness
Monthly:
- Full paper test on all kitchen knives
- Identify any knives that honing no longer restores to adequate sharpness
Every 2-3 Months:
- Full whetstone or electric sharpener session for knives that have lost their edge despite regular honing
- Inspect all knives for chips or damage that requires professional attention
Annually:
- Professional sharpening service for Japanese knives
- Full geometry assessment and restoration for the complete knife collection
- Replace any knives that have been sharpened to the point where the blade is significantly narrower than original
Common Mistakes When Sharpening a Knife
When learning how to sharpen a knife, avoid these errors:
- Using a honing steel when sharpening is needed: Honing cannot restore a genuinely dull knife — if honing no longer improves performance, sharpening is required
- Inconsistent angle during whetstone sharpening: Angle consistency produces better results than the exact angle chosen — pick an angle and maintain it throughout the session
- Over-sharpening: More passes do not produce a sharper knife — excessive sharpening removes unnecessary metal and shortens knife lifespan
- Using a pull-through sharpener on Japanese knives: The fixed angle of pull-through sharpeners does not match the 10-15 degree angle of Japanese knives — use a whetstone
- Cutting on glass or ceramic surfaces: These surfaces destroy knife edges faster than any amount of proper sharpening can compensate for
- Putting knives in the dishwasher: Dishwasher vibration, heat, and harsh detergent damage both the blade edge and the handle — always hand wash quality knives
Sarah’s Final Advice
Mastering how to sharpen a knife is about building two habits: regular honing before or after every cooking session, and periodic sharpening when honing no longer restores peak performance. The honing steel is your most important daily maintenance tool — 60 seconds of honing before cooking maintains the edge that sharpening creates.
For the investment in sharpening equipment, I recommend starting with a quality honing steel and a 1000/6000 combination whetstone. The whetstone requires practice but produces the best possible edge of any method and represents a one-time investment that lasts decades. For Western kitchen knives that need quick touch-ups, a quality electric sharpener like the Chef’sChoice provides excellent results with zero learning curve.
In my Austin kitchen, properly maintained sharp knives have genuinely changed my relationship with cooking. Prep work that used to feel laborious — dicing onions, julienning vegetables, slicing proteins — becomes fast, precise, and satisfying with a properly sharpened knife. The 5 minutes invested in knife maintenance before cooking saves time and frustration across every meal.
For more kitchen maintenance guidance, see my Best Kitchen Knife Sets 2026 for knife recommendations, or explore my How to Remove Rust from Kitchen Knives for restoring neglected blades before sharpening.
Shop the Sharpen: Sarah’s Knife Sharpening Essentials
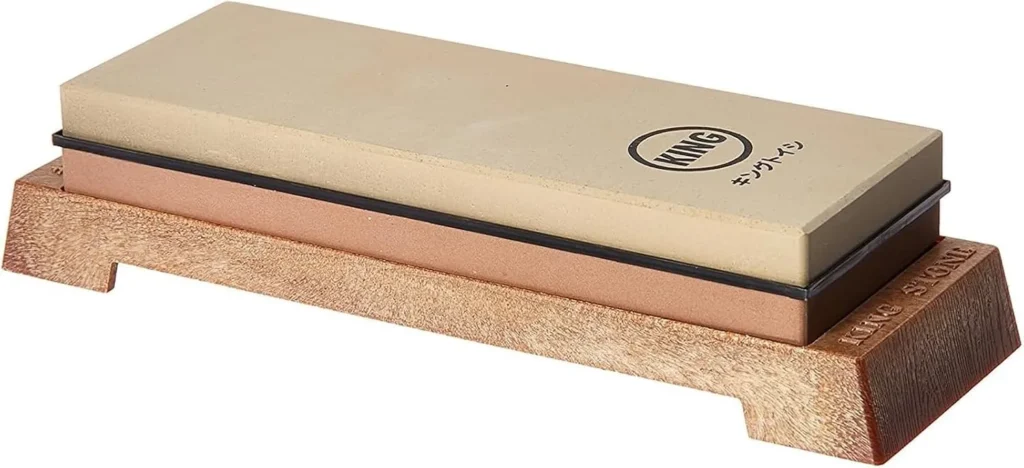
1. King KW-65 1000/6000 Combination Whetstone
The best entry-level combination whetstone for home cooks beginning their sharpening journey. The 1000 grit side handles primary sharpening while the 6000 grit side polishes the edge to a razor-sharp finish. Includes a non-slip base for safe, stable sharpening sessions.
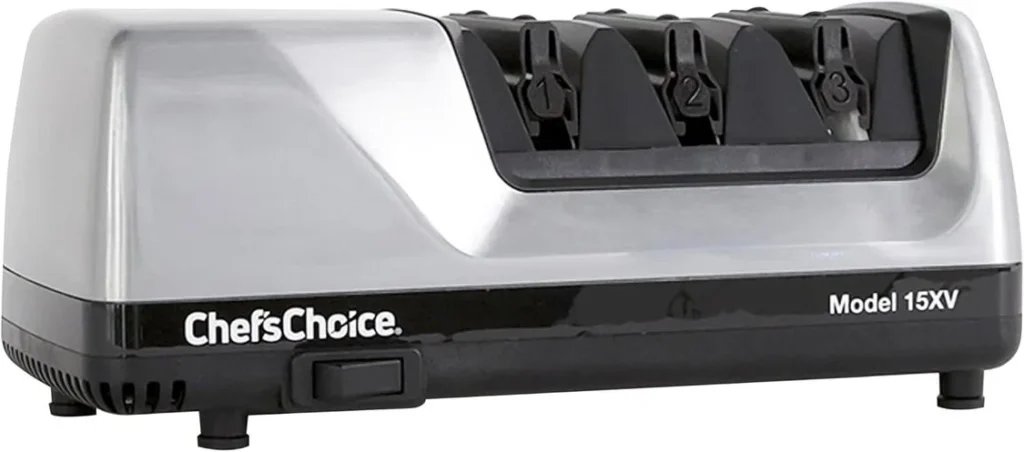
2. Chef’sChoice 4643 Electric Knife Sharpener
The best electric knife sharpener for Western kitchen knives in 2026. Three-stage sharpening system with diamond abrasive wheels produces a factory-sharp edge in under 2 minutes with zero technique required. The most time-efficient sharpening solution for busy home cooks.
3. Wüsthof 10-Inch Honing Steel
The best honing steel for maintaining Western kitchen knife edges between sharpening sessions. The ridged steel surface efficiently realigns the knife edge with 4-6 strokes before each cooking session — the single most impactful knife maintenance habit available.